3-D Printing the Double Bubble
A Jetliner For A Fuel-Starved Future
A Jetliner For A Fuel-Starved Future
Slimming down the classic passenger jet
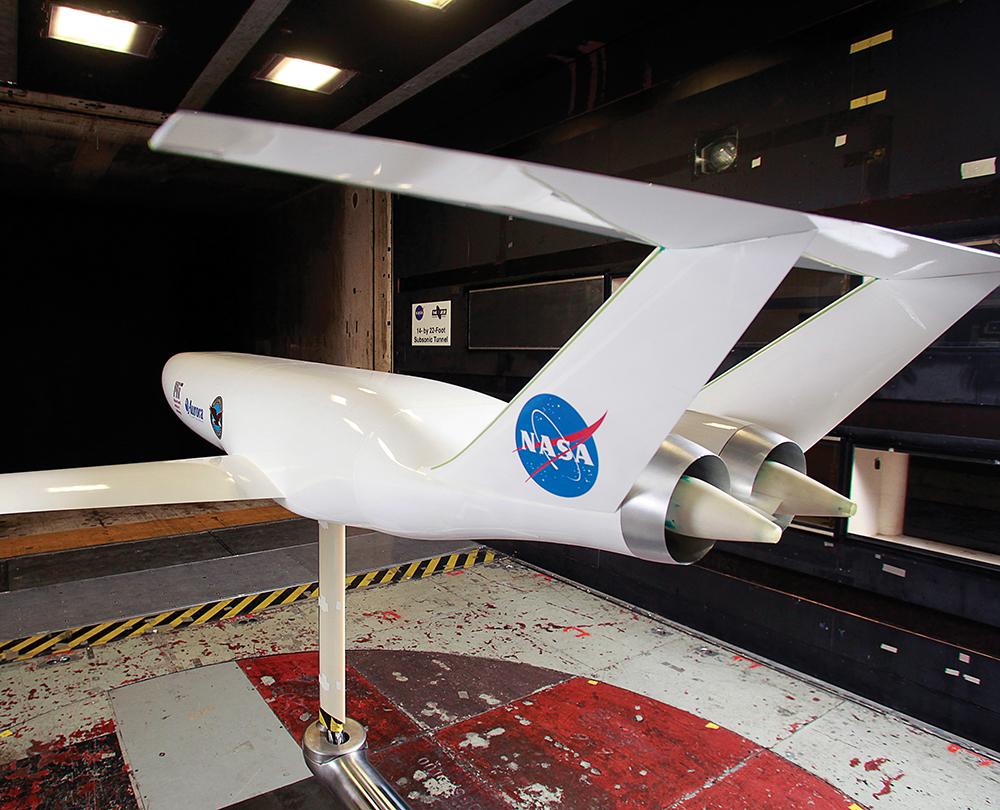
An MIT team has turned a multi- million-dollar NASA contract into the most advanced rethink to date of the classic passenger jet. The design, nicknamed the Double Bubble, calls for an extra-wide fuselage and rear-mounted turbofan engines. The configuration would allow the craft to burn 70 percent less fuel than a Boeing 737 while producing significantly less noise and nitrogen oxide, a pollutant that causes acid rain.
So when can we board? NASA says it would like to see the 180-seat craft airborne by 2035, when air traffic is projected to double. Engineers will push toward that goal this summer, when they subject a scale model to a second round of wind-tunnel tests at Langley Research Center. Here’s a look at some of the fuel-saving features they will scrutinize.


3-D print your very own Double Bubble Airplane
3-D Printing the Double Bubble

When Popular Science gave me an assignment to illustrate a concept plane for the magazine, I saw it as an opportunity to showcase my latest skillset, 3D printing. My work has published inPopular Science since my first assignment in 1996, but this would be the first time offering 3D printing in conjunction with my normal illustration. The idea I pitched to the magazine was that they could put the 3D printable “STL” files on their website so readers at home, or students at school, could 3D print something they read about in the magazine. As far as I knew, nobody had done this before.

The model for the project would be used twice. Once for the magazine illustration and once to create the geometry for the 3D print. The goal was to build the model so it could satisfy both needs. To create the model I used the 3D modeling, rendering and animation system I use for all my current work, Lightwave 3D. The latest version of the program, 11.6, now supports 3D printing, so the timing was perfect. I could have used any number of programs to create the model, many of them, like Blender, are free. But I switched to Lightwave in 2004 and creating 3D geometry has become second nature to me. While the program isn’t perfect for creating models for 3D printing, its many pro’s outweighed the cons and finding work-arounds with issues that came up wasn’t too much of an issue.

While building the model it occurred to me that maybe there was a way to use the texture maps I created for the illustration on the 3D printed version. When I was a kid I built countless model airplanes, and much of the details were done with decals supplied with the kits. Could I print my own decals? A Google search of “print my own decals” quickly showed that this is very common in the model making world for everything from model train to RC enthusiasts. A short visit to Amazon and several packs of transparent decal sheets were ordered and would arrive in a couple days. Gotta love Amazon Prime!

When printing with a Fused Filament printer, there are a few things to keep in mind. One critical concern is that the printer lays down one thin layer at a time from what can be compared t0 as a really small glue gun. Each layer is about as thick as a sheet of paper. As the printer lays down a layer, it needs to print on something, it doesn’t like printing on thin air. So you either build up on the same object, or you can use supports. Most FF printers will forgive you up to about a 45° angle. So to create this plane, I divided the main hull of the craft in half so the body could print vertically upon itself. The same would go with the wings. To take advantage of the fact that the plane could be taken apart, I decided to make it a “3D Printed Infographic,” to that end I created rows of seats so people could see what it would look like on the inside.

Once the model is built, a STL file is exported from Lightwave and opened in a program where the printer perameters can be set. I like to use Simplify 3D because of the level of control that it allows. Many variables determine the quality of the final print, including print head speed and layer height. These variables and about 80 others can be adjusted in this program.

Once the file has been ‘sliced’ into the many layers that will create the final build, these instructions are sent to the printer. In my case I output an .X3G file, put it on an SD card and plug the card into the printer. The printer could be controlled directly from the computer, but if the computer fails or the program is accidentally exited, it would ruin the print. Because of this I like to use the SD card.
Getting prints to stick to the bed can be tricky. After much experimentation I found that Scotch painter tape, scrubbed with isopropyl alcohol worked perfect for me. This model was built using PLA plastic, a corn-starch derivative. I don't apply any heat to the bed and use a nozzle temperature of 205°. The nozzle size is .4 mm and the layer height is 0.17 mm with a print speed of 3500 mm per minute. The resulting file takes about 15 hours to print.

The next step was building the plane. To assemble the two sections I created an internal ‘sleeve’ with slightly raised ‘friction ridges’ on all sides. This would hold the craft together without glue, and allow the user to pull it apart.

I also created small ‘biscuits’ to fit into the wings and stabilizers to position them for future gluing. I used Loctite Super Glue Ultra Control Gel to assemble my 3D prints.

With the plane assembled, I turned my attention to the decals. I created the artwork in Adobe Illustrator and then brought the file into Photoshop to tweak it and to save the file as a PSD file which can be used both for image mapping on the 3D file in Lightwave as well as printing on the decal sheet. Both of these could be done in Illustrator alone, but I am a creature of habit and I'm used to processing my image maps in Photoshop.

The Testor decals come in half-sheets, which is about as small as you can get something through an ink-jet printer. I set up enough decals to take care of 2 planes and threw in a few extra items for good measure. I'm sending this plane up to the creative director at Popular Science, so for kicks I put the name of their parent company on it. After printing out the sheet I sprayed three coats of spray lacquer on it, allowing it to dry between each spray. Inkjet ink is water soluble, so you need to spray lacquer on it to ‘fix’ it to the decal sheet. Once dry, you trim out the pieces you want individually and drop it into a small bowl of water for about 10 seconds. Blot it off with paper towel and slide the decal off the paper backing and carefully into place. Clean your model first. I found if any oil from your hand gets on the plane, the decal might not stick. I cleaned it with isopropyl alcohol on some paper towel.

With the final plane done, I sprayed it with a final coat of lacquer to help stabilize the decals. The print is done! To complete the process, I created a ‘how to assemble’ diagram of my creations.


